Week 1 Todo App
One of the project this year is to make a Todo App. If you search todo app in the app store or play store there are a lot of options. However I tried a few of them, and often they are either too complicated to use, or they are just missing some functions I want. So this upcoming month, I am planning to launch my Todo App called Subtle from scratch.
Part 1: Planning Phase
For the planning I used Adobe XD to help me finalize the design. Adobe XD is a free app that helps you design the UI (User Interface) of the app.
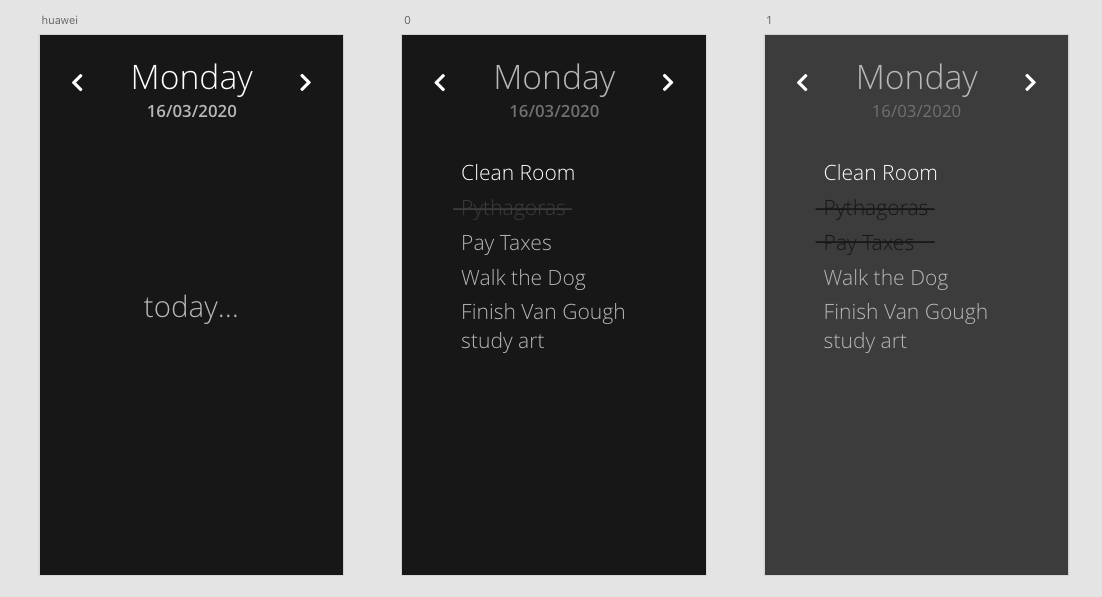
Here are a few snap shots of my app (in planning phase). I am aiming for a minimalistic app, which is simple and clean.
After you finalize the UI of the app, let’s move on to the code. 😉
Part 2: Front End
When creating an app there is Front End and Back End. Front End is the client side, where it consists of UI, color scheme, UX. Back End is the database side, where it consists of database, schemas, authentication and many more.
We will start with the Front End.
Tools
- React Native (A programming language developed by Facebook, it isn’t a native language which means it doesn’t use Swift, Java or Kotlin. But it uses Javascript and Typescript to build apps that are available for both IOS and Android devices 😀 )
- VS Code (Code Editor, I want to switch to Vim but I don’t have time to learn and install all the bundles and depencies, so I am sticking with VS Code)
- iTerm (Terminal)
Part 3: Setting Up
npm install expo-cli --global
expo init newProject //your project name
cd newProject //your project name
expo start
I used expo to setup my project. Expo is a tool that can help you build a React Native app quickly, there is also an app (Expo) which you can install on your phone to render your app live.
DoubleTap
I replaced the TouchableOpacity button with DoubleTap. So when you double tap the screen it will submit the todo item to the database.
function DoubleTapButton({ onDoubleTap, children }) {
  const onHandlerStateChange = ({ nativeEvent }) => {
    if (nativeEvent.state === State.ACTIVE) {
      onDoubleTap && onDoubleTap();
    }
  };

  return (
    <TapGestureHandler
      onHandlerStateChange={onHandlerStateChange}
      numberOfTaps={2}
    >
      {children}
    </TapGestureHandler>
  );
}
onSubmit
Create a simple TextInput and call DoubleTap. When you double tap the screen, the item in the text input should call a function this.onSubmit. It should console log the item on your terminal.
onSubmit = () => {
  const todo = {
    title: this.state.title,
    status: this.state.status,
    date: this.state.date,
  };

  console.log(todo);

  this.setState({
    title: "",
    visible: !this.state.visible,
  });
};
AddTodo
I added an if...else statement so it could switch pages easily. Not sure if this is the most effective way. I am planning to use Routes next time just to test different methods out.
<DoubleTapButton onDoubleTap={this.onSubmit}>
  <View style={styles.container}>
    {this.state.fontLoaded ? (
      <View>
        {this.state.visible ? (
          <View>
            <Text>Welcome</Text>
          </View>
        ) : (
          <View>
            <TextInput
              style={styles.title}
              onChangeText={(title) => this.setState({ title })}
              value={this.state.title}
              placeholder="today i will..."
            />
          </View>
        )}
      </View>
    ) : null}
  </View>
</DoubleTapButton>
END
This blog gave you a simple tutorial on starting and adding features to your Todo App.
I have put the full source code for this week’s tutorial on Github. Good Luck!
Thanks for reading 👀. There will be a weekly blog every Friday, Stay Tuned.😉